Wearable Planter

Jewelry and Accessories for Green Thumbs

(Very) Last Minute Gifts for Makers

colleen jordanComment

Did you procrastinate on buying gifts for your family and friends? That's okay, I did, too! Our deadline to ship in time for Christmas has passed, but we've got you covered if you have access to a 3D printer (or are getting or giving one this season)!

This Monday, a few days before Christmas, I checked out the local makerspace in my mom's town. Her town of Ridegewood, NJ, is incredibly lucky to have a 3D printer for residents to use. If you're the last minute kind of maker, we've added a bike planter for you to print to our thingiverse page. The files are free for anyone to use!

We discovered on previous prototypes that the type of clip we use on our regular bike planters doesn't print well on home printers like MakerBots, so you'll need a cable tie or colorful ribbon to attach this vase to your bike. 

plant-2.jpg

If jewelry is more your style, you can also find one of our necklaces there to print, too. To print these files, use your 3D printer or one you have access to at your local makerspace. Add some small cut flowers, or follow our instructions to plant small succulents, and you've got a great handmade gift for the green thumb or nature lover in your life!

Make your own felt mistletoe

DIYcolleen jordanComment
mistletoe-1-6.jpg

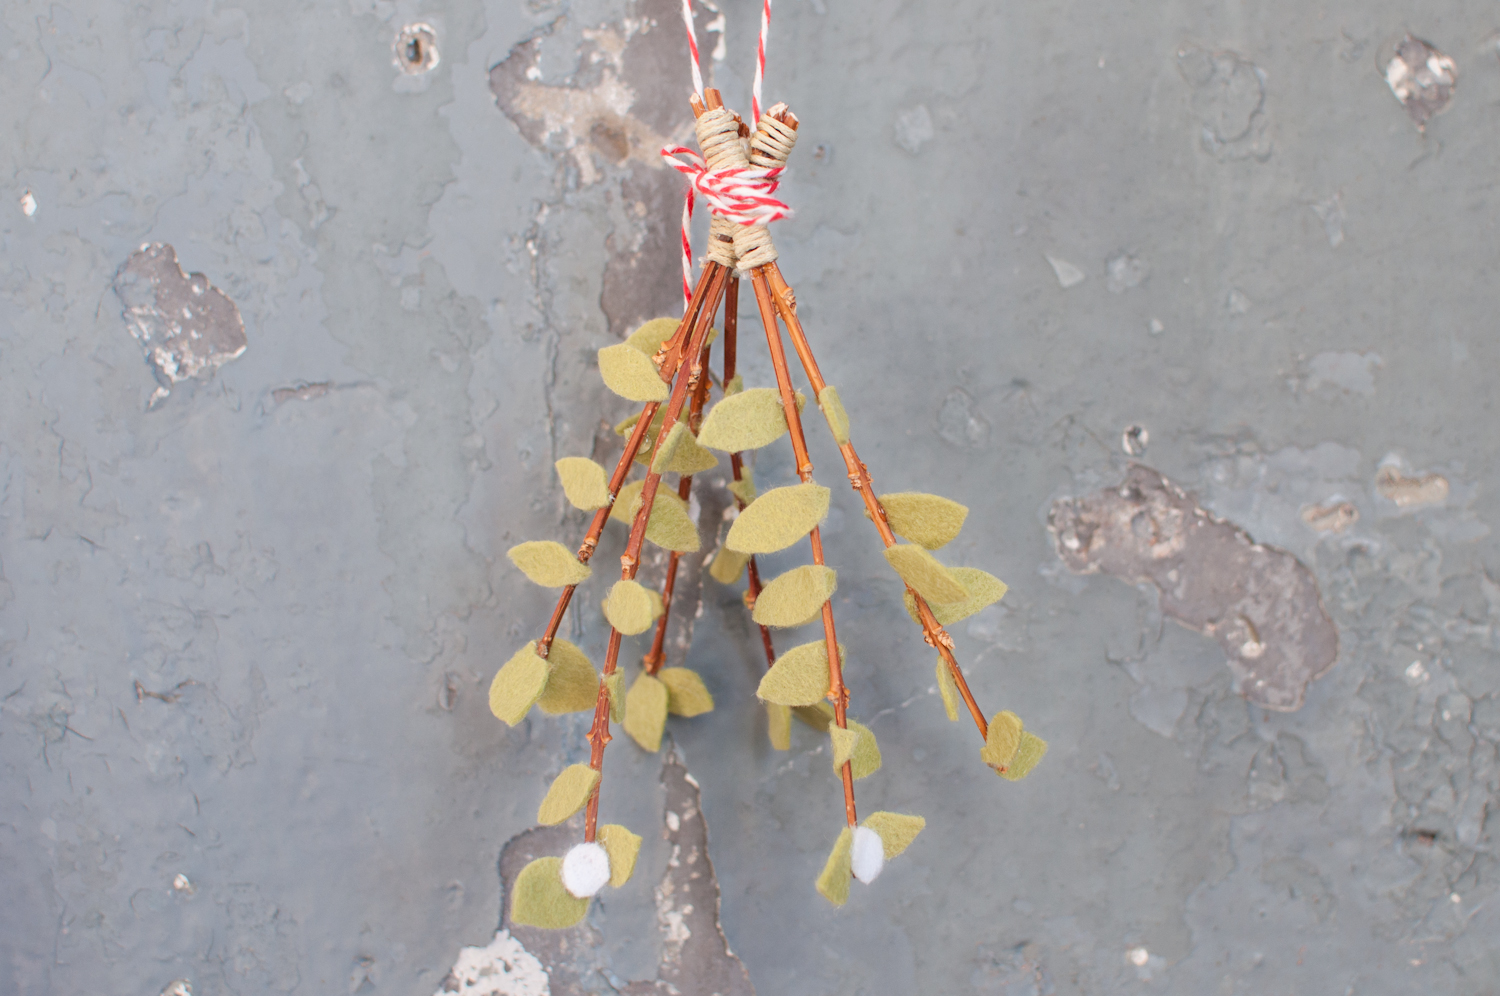
It's the holiday season, which means its time for decorating and bringing some cheer to your house! To start our decorating for the holidays, we decided to make some mistletoe out of felt. If you're looking for a non traditional look, or are worried about allergies, you can make this mistletoe to bring some cheer to your holiday party or decorations! Since this mistletoe is made out of felt, you can keep it to use for years to come.

The traditions around displaying greenery and evergreens indoors around the winter solstice goes back millenia. In the 1st century A.D., the Celtic Druids saw this plant that bloomed and remained green in the cold as a symbol of vivacity and fertility. Overtime, mistletoe evolved into a holiday decoration, with a berry plucked from it every time there was a kiss beneath it. Today we hang mistletoe in our houses as a holiday decoration and to brighten up Christmas parties.

This DIY is really easy to do, and if you have all of the materials on hand, it will probably take you less than 20 minutes from start to finish. If you don't have all of the materials on hand, you can probably find them all for less than $5 at your local crafts store, so it is an inexpensive activity, too. If you're looking for an activity to do with children, this could probably be done by tiny hands, with only minimal help with the hot glue.

Step One: Gather your supplies

To make this felt mistletoe, you'll need:

  • Green and white felt. We used 100% wool felt (also called fancy felt). You might not be able to find this at your local craft store, but you can find it in a large assortment of colors on Etsy.
  • Cotton twine or cord
  • scissors
  • 4"-6" long sticks or branches. We cut ones left over from a flower arrangement.
  • hot glue and glue gun or tacky glue
  • Red or green ribbon to tie the mistletoe together. We used red and white baker's twine since it's what we had on hand, but you can use any ribbon that you'd like.

Step Two: Make your branches

We started by making the branches for our mistletoe. First we glued the branches together to create forking branches and to keep them secure. We finished them off by wrapping the tops of them with the cotton cord. This hides the glue and makes them look more finished.

Step Three: Cut out your leaves

Cut out the leaves from your felt. We cut out leaves in two shapes, an oval shaped one, and one shaped like cat's meow glasses. Don't worry about making the shape of each one perfect. We've included a template for you to see the shape of the leaves that you can print out if you need a guide. We cut out six smaller leaves and one longer leaf per branch, but you can cut out and use as many per branch as you see fit.

Step Four: Glue leaves onto branches

Next, we glued the eyeglass shaped leaves to the end of the branch. Place a drop of glue at the end of the branch, and wrap the felt around the tip of the branch. Pinch the felt and the branch together for a few seconds to secure the bond with the glue.

From there, glue the smaller petals, pointing slightly downward, up the branch. Alternate sides with every other petal. Repeat for each branch.

While working on this DIY, we found some white felt. To make the mistletoe look more realistic, we cut out some small circles from the white felt, and glued them in a few places on each branch to mimic the berries found on some types of mistletoe.

Step Five: Glue Branches Together

Once you've added the leaves to each branch, decide how you want your branches to sit together. We glued them together to secure them in place.

Step Six: Tie ribbon around the mistletoe

You're almost done! Tie your red ribbon around where your branches meet. Et Voilà! You've just made your own mistletoe! Hang it from your doorway, and you're now ready for your holiday party!

If you liked this tutorial, we have more tutorials here on our blog and Instructables page for you to enjoy. We learned about the history of the mistletoe from the Smithsonian magazine and the History Channel.

Wearable Planter at the High

Announcementscolleen jordanComment
700x700_HandameHigh.png

Exciting news! This holiday season, certain Wearable Planter products will be at the High Museum of Art gift shop. Our items were selected in partnership with Indie Craft Experience to be part of their Handmade at the High selection, along with the work of other local independent designers, makers, and artists. Our items will be available there through the end of the year. 

More information about the event is available at www.high.org.

shop small this holiday season...

colleen jordanComment

It's the beginning of the holiday season, and we're going to start it off with a sale! Don't worry, we won't make you wait outside in the cold or really early in the morning. From now through December 1st, you can take 20% off all orders over $45 by using the code "SHOPSMALL14" at checkout.

We're thankful for our great customers and friends and in the design and 3D printing communities! Thank you for being supportive of our business and letting us share our whimsical ideas with you!

Holiday ordering Deadlines

colleen jordanComment

The holidays are here, and to ensure that you get your orders in time for the holidays, we've calculated some ordering and shipping deadlines to make sure your presents are under your tree on December 25th.

For ready to ship items:
For orders shipping within the United States, please place orders by noon on December 19.
For international customers, please place orders by noon on December 8 if you are selecting first class shipping, or by noon on December 11 if you would like to use priority mail shipping.

For 3D Printed on Demand products:
US Customers, please place orders for items that are 3D printed on demand by 6:00PM EST December 10. We are basing this shipping deadline on making times established by our 3D printing service, Shapeways. Our bike planters and rings can also be ordered through Shapeways for US and international customers.

We've based these shipping and ordering deadlines on the shipping calculator on USPS.com. Due to customs regulations in Brazil, Italy, and Germany, it may be hard to estimate delivery time for orders going to those countries. Feel free to get in touch with us through our contact page if you have any questions about holiday shipping.